Rationale
Of course, you have to develop software on the OS chosen for your shiny new embedded system. There are thousands of programming languages, but embedded systems have some special features that, in principle, limit the choice.
This session is focused on giving some hints about this idea. And play with the C language.
Starting point: you have some knowledge of imperative programming.
Programming languages for embedded
It is pretty simple, if you need to use a microcontroller, then try to use C/C++. If your processor is more powerful, then you can play around and mix other things such as python, java, javascript, etc. Have you considered Rust?
Well, before we playing, let’s make room in the RPi’s SD card.
Check space,
$ df
Eliminate and “purgue” packages,
$ sudo apt-get purge libreoffice*
$ sudo apt-get purge wolfram-engine
$ sudo apt-get clean
$ sudo apt-get autoremove
And check again.
Connect something to you RPi
Well, I need something interesting for this session. Let’s take a look at the IO interfaces.
C/C++ and the Raspberry Pi
Thanks to the GNU gcc compiler collection , you are plenty of options for embedded development. From small microcontrollers until the sky … for free and open.
- The GCC toolchain on the RPi
- (Deprectad: Slides about installing wiringPi from scratch and connecting a LED to the GPIO to test it)
Now, keep in mind that there are toooonnnns of interesting open source projects that provide high-quality professional-grade libraries and tools for your own projects. Your Android or iOS smartphone are plenty of these projects. Also, commercial projects are very interesting here. Don’t discover the wheel (<- buscar expresio anglesa), please.
Well, apply now the command ldd on the executable obtained in this session.
$ ldd ./blink
Get help using,
$ man ldd
Activity: The laser module
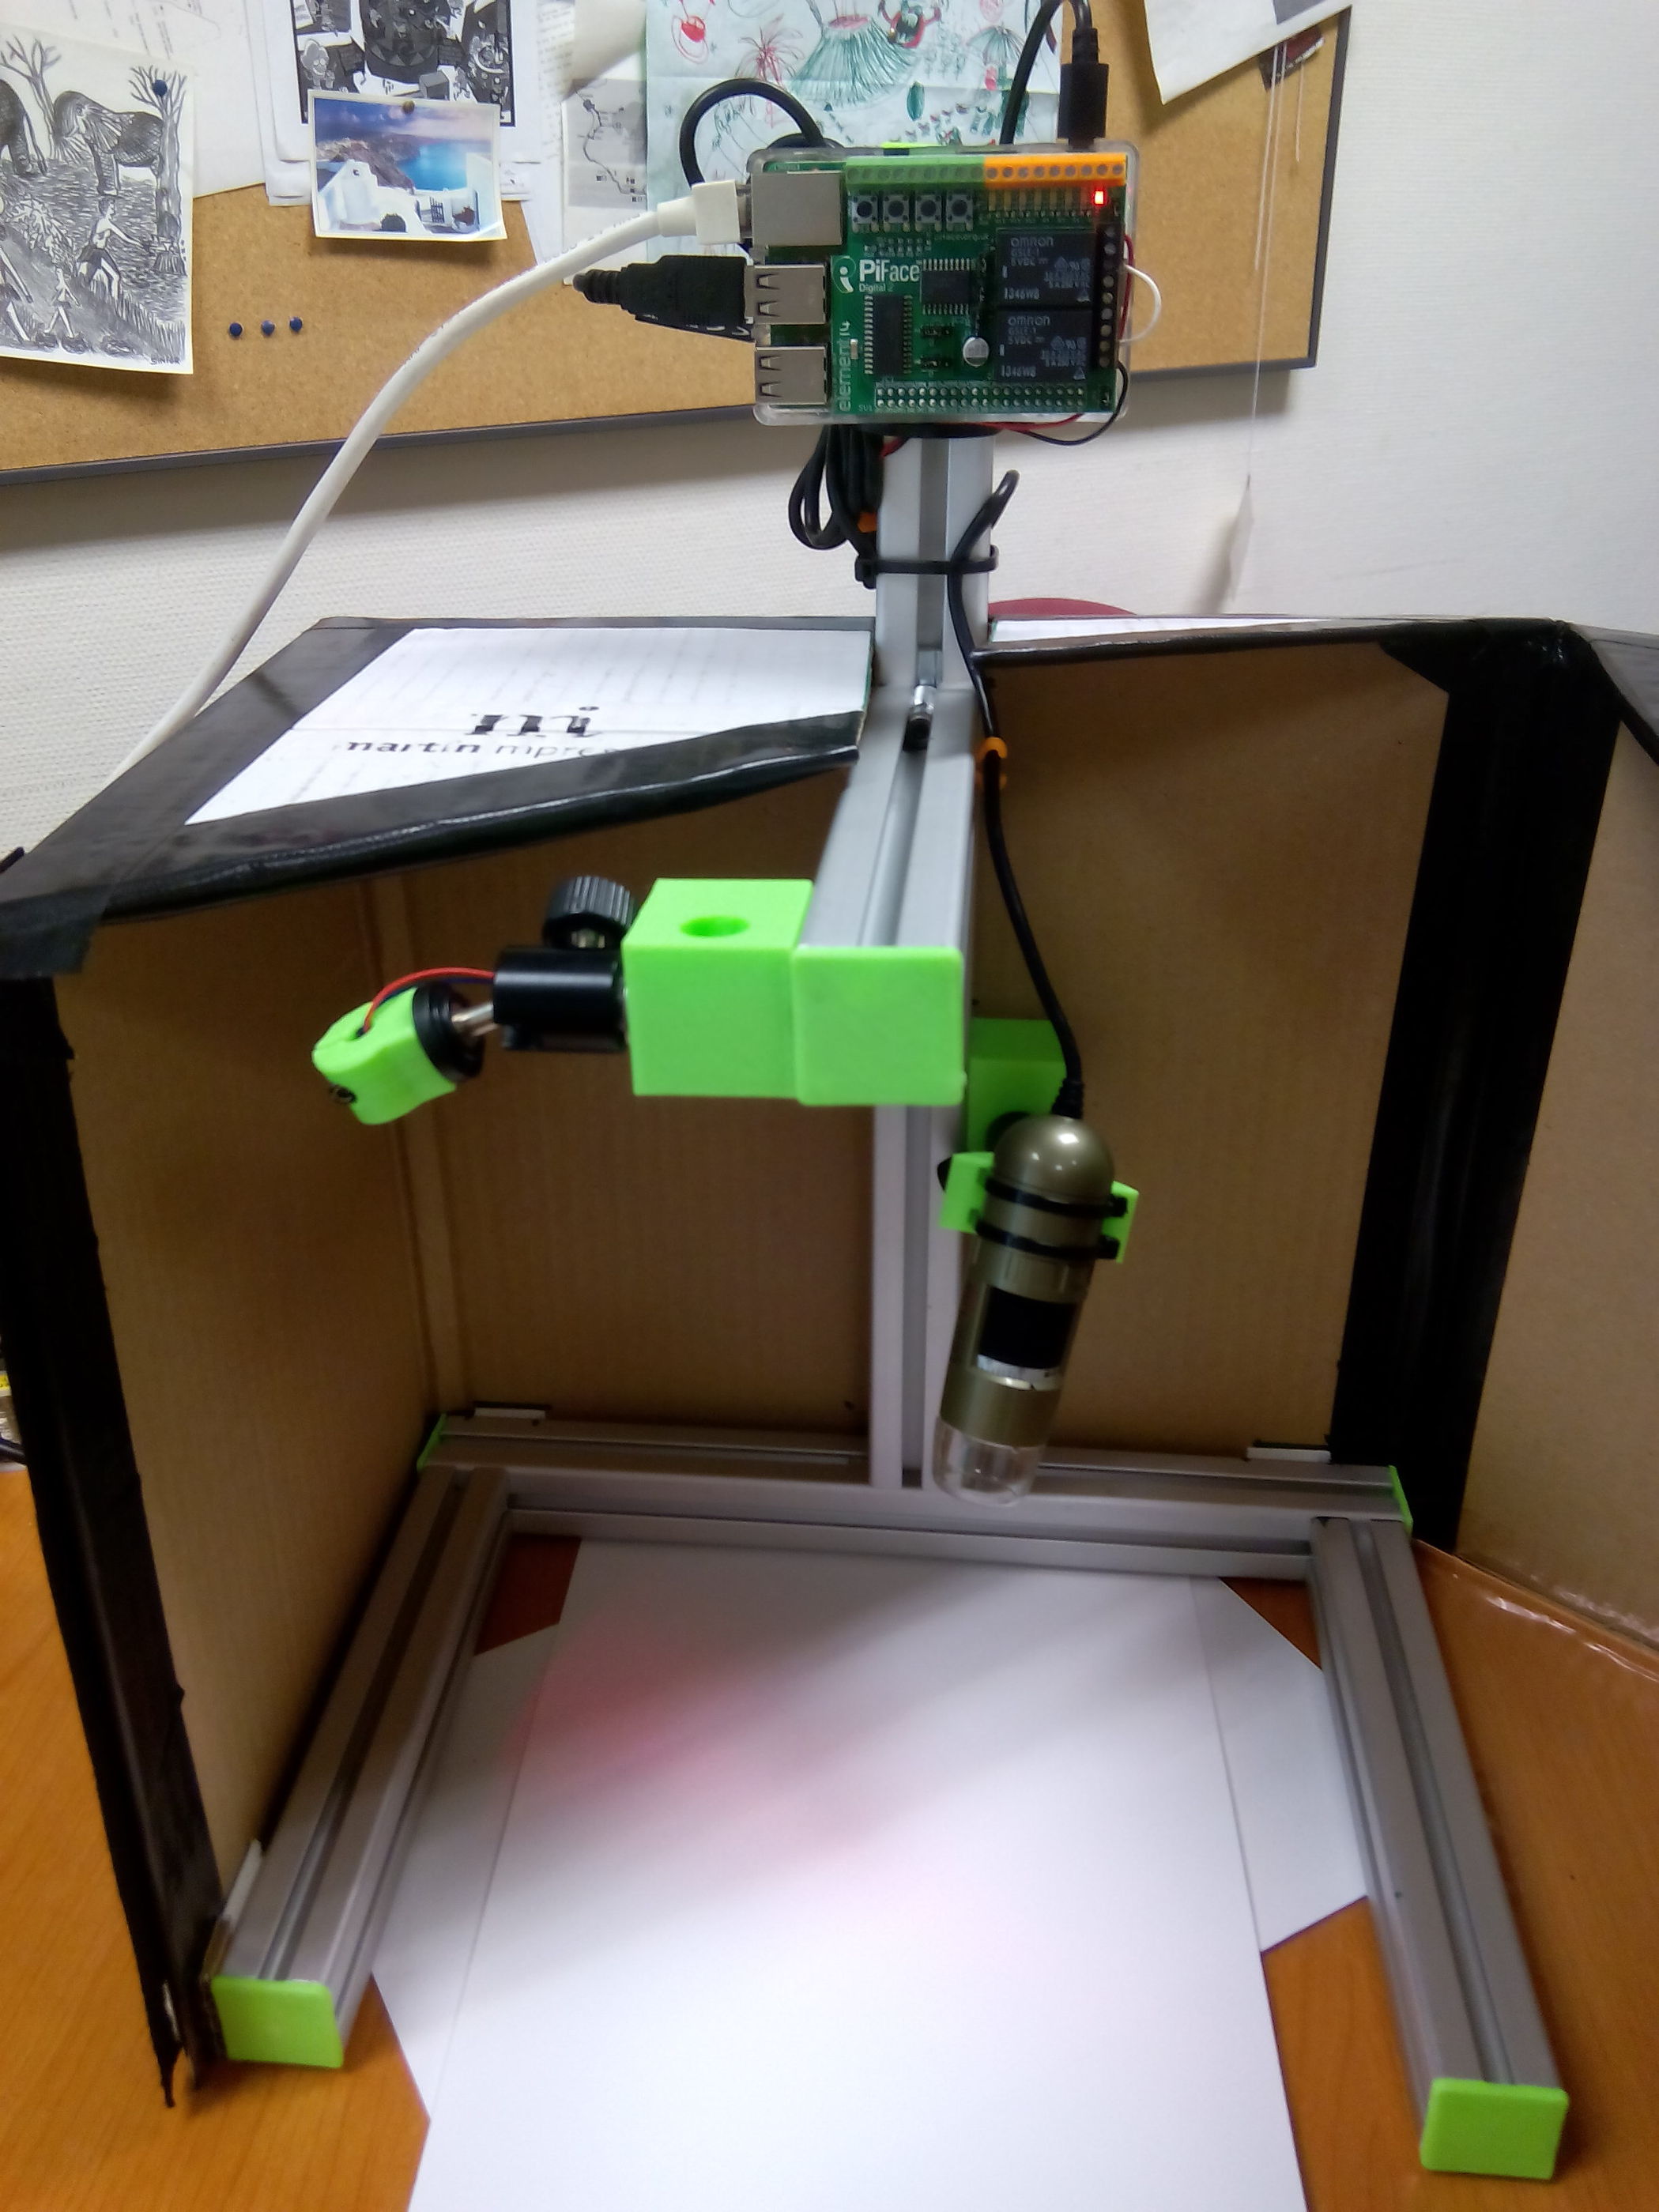
Develop a modular application in C for handling a Laser device. This is part of a real project were a true laser was utilized for generating speckle patterns on canvas paintings (A Portable Dynamic Laser Speckle System for Sensing Long-Term Changes Caused by Treatments in Painting Conservation).
The real design included a Piface Digital 2 board to controll the laser and a digital microscope. The application was developed in C/C++ and included externals libraries such as WiringPi and OpenCV.
Follow these steps:
Create a directory and move to it:
$ md laser_<YOUR_NAME_INITIALS>
$ cd laser_<YOUR_NAME_INITIALS>
Create a laser.h header file using the following listing:
/**
    @file   laser.h
    @brief  function prototypes for handling the laser
    @author Angel Perles
    @date   2016/10/26

    License ...
**/

#ifndef LASER_H
#define LASER_H

int  laser_Init(void);
void laser_On(void);
void laser_Off(void);

#endif // LASER_H
Implement the functionality creating the file laser_wiringpi.c , adding the following template and fullfilling the necessary code:
/**
  @file laser_wiringpi.c
  @brief Implementation of the laser control using wiringPi libraries

  Laser connected to pin GPIO0. 1=On, 0=Off
  REMEMBER TO EXPORT THE PIN
    $ gpio export 17 out

  @author Angel Perles
  @date 2016/11/1

  License ...
**/

#include <wiringPi.h>
#include "laser.h"

/*****************************************************************************/
/**
  @brief prepares the underlaying system for using the laser
  @note This function must be called before any other laser functionis called
  @returns true if initializaion is OK

  Example:
  @verbatim
      if (laser_Init() != 0) {
        printf("Upps!! Something wrong initilitasing laser()\n");
        exit(1);
      }
  @endverbatim

**/
int laser_Init(void)
{
    // FULLFILL
}

/*****************************************************************************/
/**
  @brief turns on the laser

  Example:
  @verbatim
      laser_On();
  @endverbatim
**/
void laser_On(void)
{
    // FULLFILL
}

/*****************************************************************************/
/**
  @brief turns off the laser

  Example:
  @verbatim
      laser_Off();
  @endverbatim
**/
void laser_Off(void)
{
    // FULLFILL
}

/* End of file ***************************************************************/
Compile this module
$ gcc -c laser_wiringpi.c
List directory contents
$ ls -l
Create a test application with name test_laser.c and copy the following code:
// File: test_laser.h
// Testing the laser module
// Remember to export the associated pin!!!

#include <stdio.h>
#include <wiringPi.h> // for delay() function

#include "laser.h"

int main(void)
{

    laser_Init();

    while(1)
    {
        printf("Laser ON\n");
        laser_On();
        delay(500);

        printf("Laser OFF\n");
        laser_Off();
        delay(500);
    }
}
Build the project:
$ gcc -o test_laser test_laser.c laser_wiringpi.o -lwiringPi
And, test it!
$ ./test_laser
Go visual & multiplatform!
I think that learning a new paradigm/SDK/etc. every time a new platform appears is not a good deal for your productivity. There are approaches that tries to be “multiplatform” in order to minimize this effect. Of course, this has some disadvantages, but this not the question now.
Some options are based on native code generation departing of the use of C/C++ compiler. For example, wxWidgets, GTK and Qt. Others options are based on virtual machines such as Java and .net/C# (not recommended). And others are interpreted languages such as Python.
I like Qt, so …
- Some slides for playing with Qt on the RPi (from armpower.blogs.upv.es).
- Fast start with Qt (slightly outdated, but valid).
Activity
And now, your turn … with guidance. Wow! I love Qt!

Your preferred language is …
May be you have a preferred language. If it is Java or Python, it is installed by default in the Raspbian Linux distribution. If not installed (octave,Ada, …) , you could find the instructions for installing it.
Activity
Find the appropriate language/tool and start playing with. Show me something.
Task
Find the procedure to install the “MySQL” database manager in your RPi or in your Linux machine (real or virtual).
Create a database with a simple table with the following fields:
- timestamp (time)
- published (bool)
- node_id (integer)
- temperature (real)
- humidity (real)
- luminosity (real)
These fields represent data collected from sensor nodes. The “published” field indicates if the data has been published in the cloud.
Develop a C/C++ or node.js or Python application that creates fields and write them to the database.